
Actual color may vary from on-screen representation.
TRANSFORMATIVE POWER OF COLOR
Creating a moody space
SUPPLIES YOU WILL NEED
- Valspar Ultra Interior Paint + Primer - 1 gallon
- Valspar Cabinet & Furniture Oil-Enriched Enamel - 1 quart
- Valspar Wall and Trim 3-Brush Multi-Pack
- Valspar 3-Pack 9-in x 1/2-in Walls, Concrete and Decks Knit Roller Cover
- Valspar Quick Release Frame
- Valspar® 4-Inch Flocked Foam Mini Roller 2PK
- Drop Cloth
- Painters Tape
- Cleaning Towels
- Degreaser
STEPS
Painting dirty walls is a big mistake that many beginner DIYers make, but not me! I always use a degreaser and a cloth (or mop) to free my walls of the dirt and grime that can build up in a well-loved home.
After that, I move on to tapping. For this project, I'm doing paneling on the lower half of the wall, so to save money, I tape off the areas I don't need to paint. An angle brush allows me to cut around the corners and trim. It is tempting to go back and forth over wet paint multiple times, but that would be a mistake, leaving you with a streaky mess.
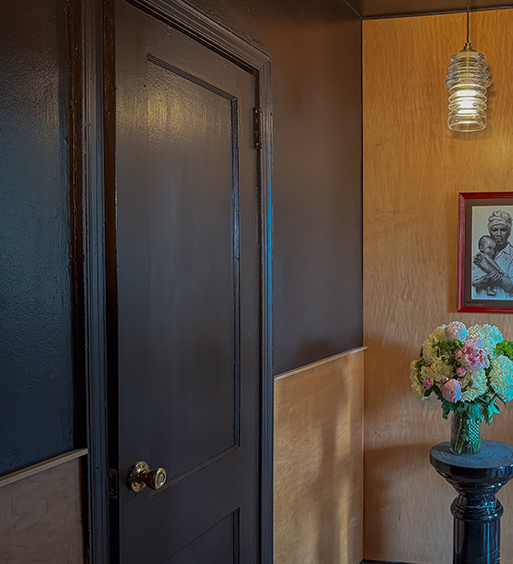
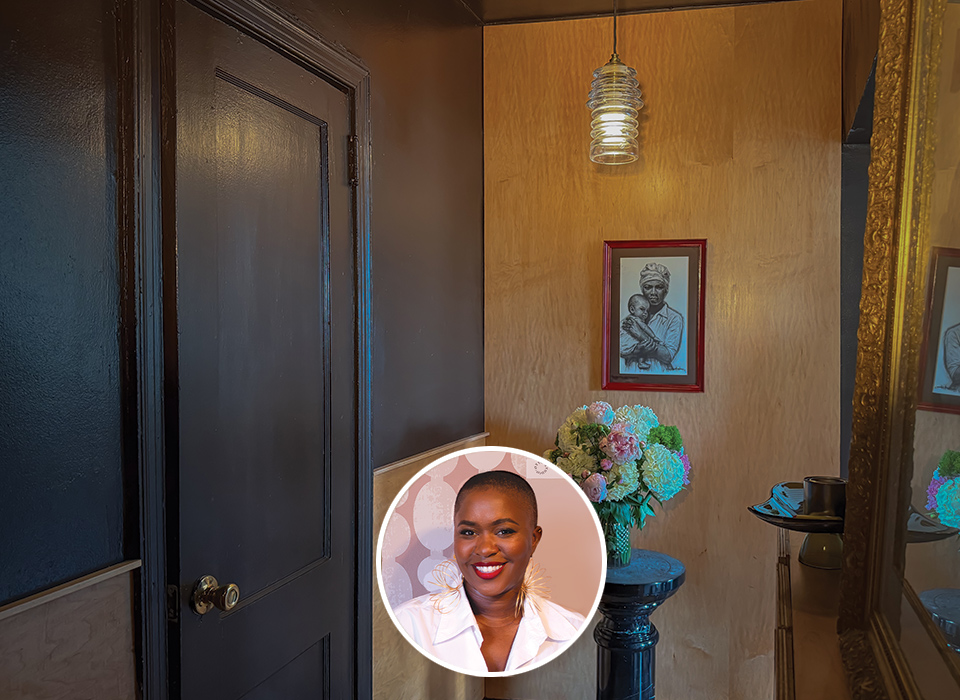
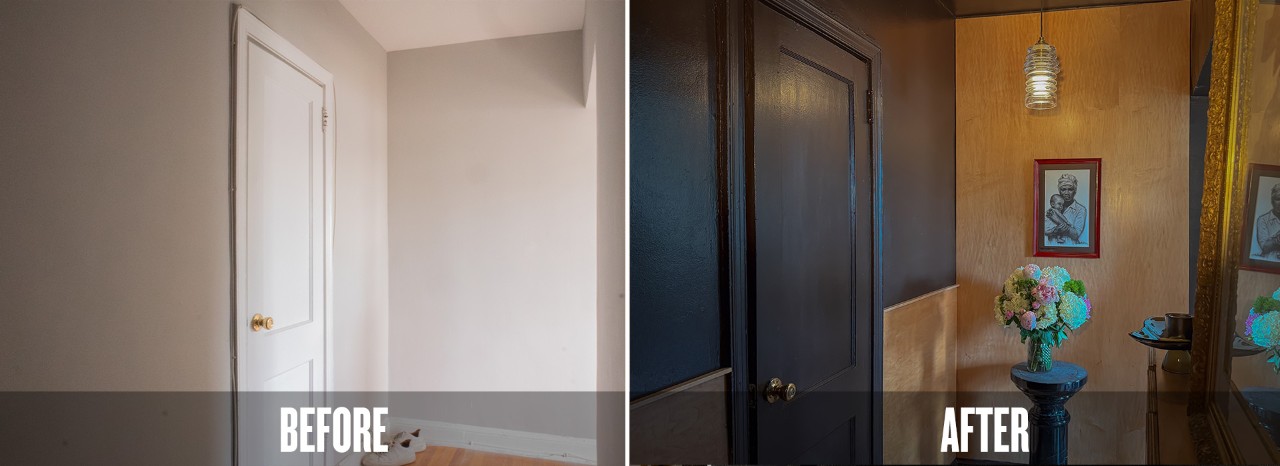
It's best to start rolling while the cut-in portions are still wet so you don't get a harsh line of demarcation. I used a roller compatible with the textured walls in Derel's nearly 100-year-old apartment with Valspar Ultra Interior Paint + Primer in the color Brown Velvet 1011-10. This part of the process is incredibly repetitive, but seeing the walls go from landlord-special grey to a rich and sexy brown is electric. Long, firm, and even strokes give the best result.
Technically, you should paint the ceiling first, but since I'm color drenching the room, I did the walls first and was careful not to disturb them while working on the ceiling. Recoat after 2-4 hours.
While some people like white doors and trim, I don't. I coated them with Brown Velvet 1011-10 in the Valspar Cabinet and Furniture Oil-Enriched Enamel, cutting in with a small angle brush and rolling the doors using a dense foam roller to get a smooth and even coverage.
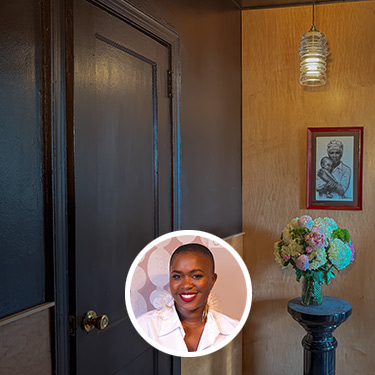
Once the paint was dry, I added the storage shelves and wall paneling, which were sanded and stained to match the color of the flooring. Fresh flowers, candles, precious artwork, and catchall trays help bring the space together so my best friend, Derel, can enjoy his newly improved entryway.

MORE PROJECTS BY IMANI KEAL
NEXT PROJECT
Coming Soon